4.22.2013

Adventures in dyeing

I'm back. I took a short break from this blog, and it turned into a year long break. So I thought I'd start back up with an exciting post about dyeing fabric!

I found what at one point had been a nifty white skirt with black polka-dots at a thrift store. However, the black dots were somewhat faded and the white was more of a light grimy gray. It fit pretty well though, so I decided to get it anyway and dye it some fun color.

I used my washing machine and let the fabric agitate in hot water for an hour. I stuck a yardstick under the lid to keep the washer from going into the spin cycle. The heavy duty cycle on my washer agitates for about 15 minutes, so I had to restart the washer four times before letting it go into the normal spin and rinse cycles. I then washed everything once more in cold water to rinse everything out really well.


The bottle said to use 1 cup of dye per two pounds of dry fabric. I wanted a lighter color, so I went with 1/2 cup of kelly green and 1/4 cup of denim dye. The results still turned out a little lighter than I wanted, but that's okay. Next time I'll add a lot of salt (for cotton fabric) to help set the dye better.


One thing to remember when dying clothes is that cotton picks up the dye much much easily than anything else. In the picture below you can see that the zipper is still white, and so is the white polyester thread.


And here's my nice new green skirt! I might hem it to knee length, but haven't decided for sure so I'll probably wear it once at this length before making any more changes.


Since it would be a shame to go to all that effort for just one skirt, I threw a lot of other test items in as well.

First up is a white cotton skirt that I never wore because, well, it was white.


I'm still not sure if I'm going to wear the skirt, but at least it's not bright white anymore.
 

Next up was a white polo shirt. If you haven't caught on, I don't tend to wear lots of white. I also already had another white polo, without the silly hot pink ribbon around the neckline. Even though it's on the inside, the pink ribbon was always visible and I didn't like how it made the polo look less dressy.


Once again, a lesson in what materials pick up dye and what materials don't. The pink ribbon appears to be cotton since it picked up a lot of the green-blue dye and turned navy, but the polyester thread used to stitch the ribbon to the neckline stayed hot pink.


 I think I will actually wear the polo now!


The last thing I threw in the dye bath isn't wearable yet. It is a really cheap (as in cheaply-made fast fashion) skirt I got at a thrift store. I love the patchworkiness but the elastic at the top is totally shot and the lighter patches are see through, so it'll take some work to make it into a wearable skirt.


I tried to take a modeling picture showing how the waistband elastic is shot, but that's about the time Dr. Richard Pussycat Feynman became interested in what I was doing and the photo shoot had to end for the day.


4.12.2012

Banana Bread Recipe

Mmmm banana bread is such a wonderful prize when you forget to eat bananas before they get too ripe. When I just have one or two overripe bananas at a time I peel them and freeze them until I have enough for banana bread.


Ingredients:

3 to 5 very ripe bananas
1/2 butter or margarine or shortening, whatever you prefer
1/2 cup to 3/4 cup brown sugar (depending on how many bananas you have)
2 eggs


2 cups bread flour
1/2 cup flax meal or oatmeal or walnuts if desired
1 teaspoon baking powder
1/4 teaspoon salt


Directions:

1. Preheat over to 350 degrees F.
2. Grease 9x5 loaf pan or spray with cooking spray.
3. Combine the first four ingredients and mix well. I use an egg-beater for this step but vigorous stirring will also work. It's probably not worth getting out the mixer unless you really like cleaning your mixer.
4. Add the rest of the ingredients and stir until mixed well, but don't over-stir.
5. Bake approximately 55 minutes. Let cool in the pan for 5 or 10 minutes before removing and slicing.

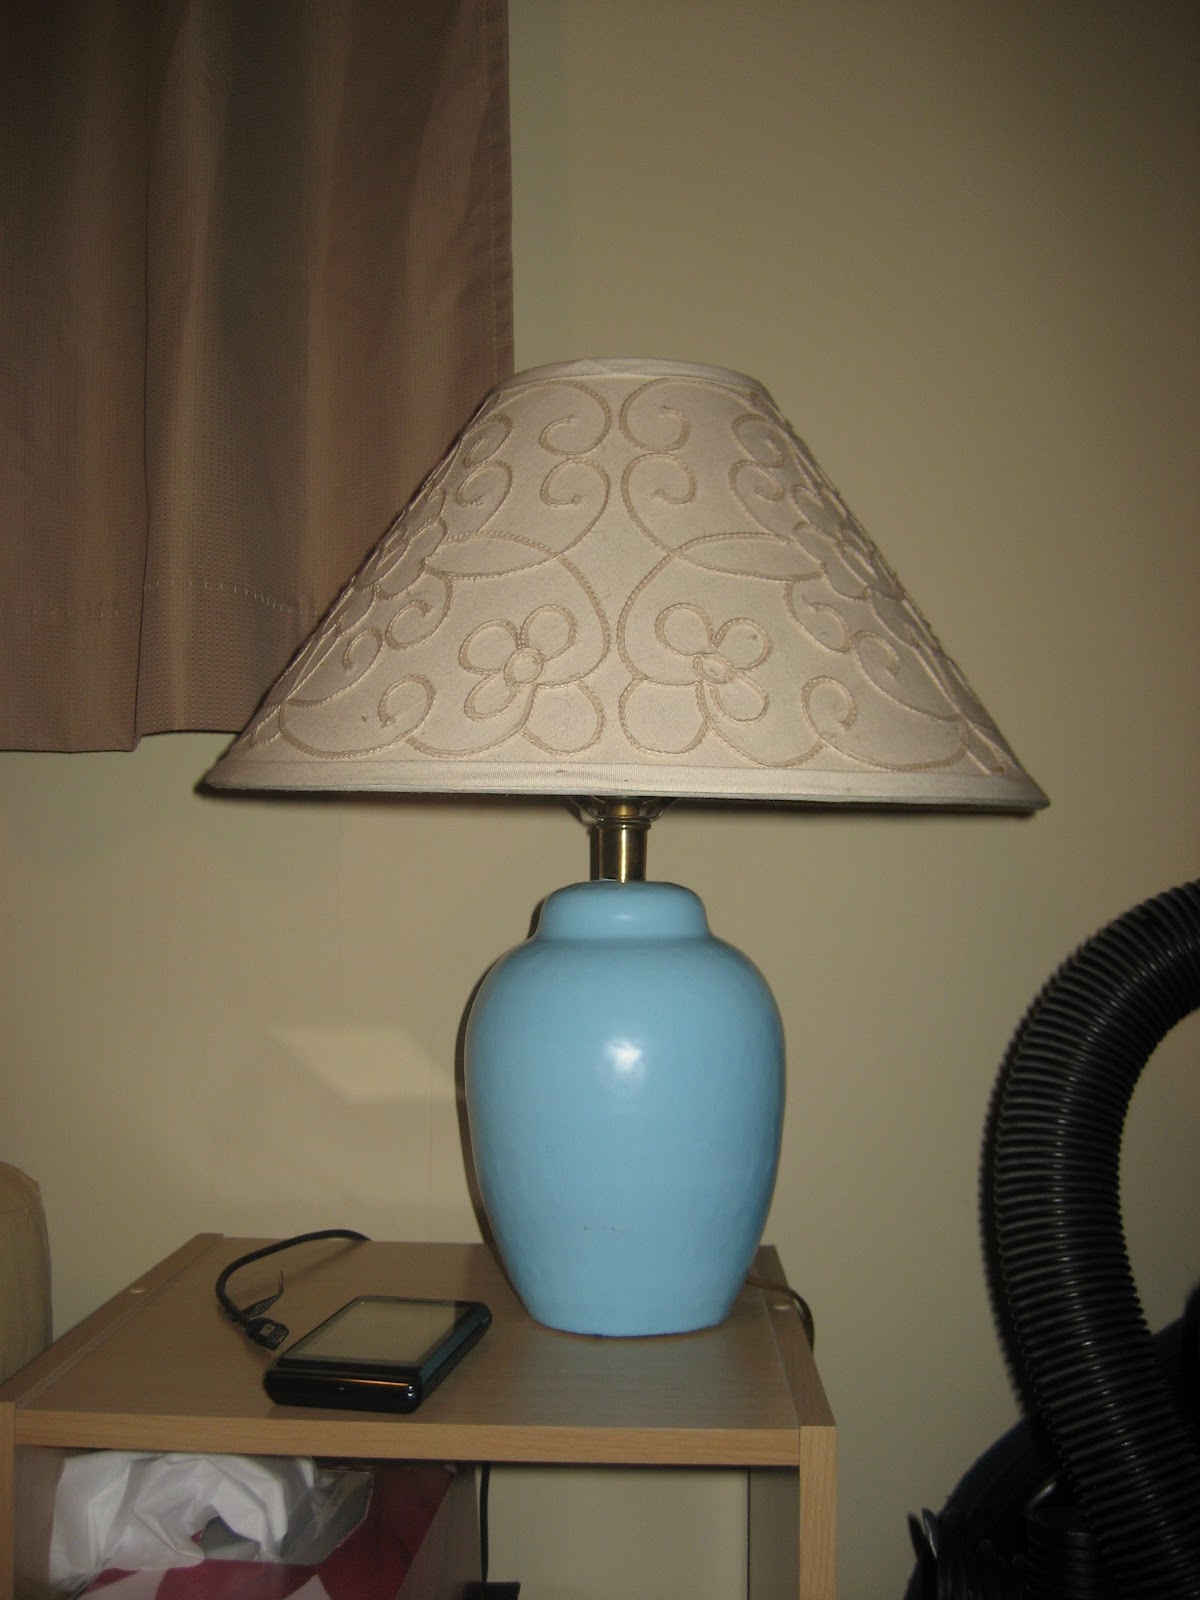
Thrift store lamp makeover

Before:


This project was pretty simple. I found this neat lamp at a thrift store, but the very gold base was scratched and ugly. But the shade was too cool to pass up--those flowers and squiggles are embroidered on! So I just took the lamp apart, spray painted the base blue, and but it back together. The only hard part was waiting for a nice day to do the painting.

After:

3.13.2012

New Cat and Spring Cleaning

I haven't been able to do any crafting for the past week or so and this adorable kitty is why!


The boyfriend and I adopted him last week. This is a picture I snapped of him hiding from the vacuum cleaner on top of the fridge. His name is Dr. Richard Pussycat Feynman, Feynman for short. He's about eight or nine months old. He's terrified of the vacuum but seems to like water, so hopefully frequent baths will help keep the dander under control. He will be taking a trip to the vet next week to get fixed, get rid of worms, and get vaccinated and stuff.

Since we're going to have to start cleaning much more often now that we have Feynman, I've spent the last week doing a massive spring cleaning and organizing. About a car load of stuff went to the thrift store, and I finally got the office all clean and organized. We've only had the apartment since July...

Step one was to go through all our books and get rid of doubles. I knew the boyfriend and I had some books in common, but once I started sorting through them I was amazed to find that we had a whole banker's box full of doubles! All good stuff like LotR, classic science fiction, classic English literature books, and then a handful of science for pleasure reading books. So those went to a friend to look through and then donate to the library to either lend out or sell in the library store. FYI the library bookstore at the main branch and Booklegger on Holmes and Jordan are the two best used book stores in Huntsville.


I also took the rest of my text books into my office on campus, so in the end we were able to reduce four mostly full bookcases to three very full bookcases. This left the smaller bookcase for me to use for craft stuff! Organizing my craft stuff was quite an ordeal. I went through all my fabric, ironed and folded everything, and sorted them into tiny scraps, small scraps, medium scraps, and large pieces of fabric, with separate containers for denim scraps and knit scraps. So organized! You can't see it in the photo, but all my yarn is sorted in a hanging shoe organizer on the right side of the closet. The fancy tin from the boyfriend's bottle of Jameson is the perfect size for holding knitting needles.


My sewing machine desk is the perfect size to fit in the little alcove in the hall! The only problem is when I'm sewing my chair blocks the bathroom door so it's kind of inconvenient. If only our apartment was on the other side of the building, then they layout would be the mirror image and the chair wouldn't block the door.


I've also been doing lots of gardening. I can't dig up the ground at my apartment complex, but I'm allowed to grow as much as I want in planters and flower pots. It just has to be obvious so the landscapers don't go over it with a weed-whacker, and movable in case the maintenance guys need to get to the crawlspace or something. I've already started oregano, basil, and dill on the windowsill, and today I picked up parsley, rosemary, cilantro, and thyme seeds that I'll plant later this week. I have some random flowers that looked pretty planted by the front of the building. On the side of the building I'm trying to grow a garden in pots...we'll see how that goes. I planted spinach, lettuce, tomatoes, radishes, carrots, zucchini, peas, bell pepper, and watermelon. Hopefully something comes out of it! The boyfriend wanted to try growing a pineapple, so we have one of those started inside.

3.02.2012

Fancy lattice shoe lacing

 I saw this on Pinterest and wanted lace my chucks that way too, but the text is in Swedish I believe, and there aren't any instructions. So I just played around with the lacing for a few minutes and figured it out on one shoe, and took pictures lacing up the other shoe.


 My shoelaces need to be washed...


Start with the laces like this:


Cross them and skip two holes, then on the inside lace back on the same side to the second hold. 


Repeat this twice, weaving under and over the laces as appropriate.


The laces that came with my shoes were only long enough to do three repeats, but there are enough holes to do four. If you have longer laces you can skip three holes initially and make the woven part larger.


3.01.2012

Tutorial: Fixing the waistband gap

I have big hips and thighs, but a smaller waist, so I get that awful gap at the top of a lot of my pants. I like wearing belts as an accessory, but I don't like that I HAVE to wear a belt so my underwear (or more :-/) doesn't show. This gap is especially bad on shorts because shorts are super casual and I never want to wear a bulky belt with them. So I took pictures to share how I fixed this problem on these shorts.

Before: stupid gap!


Cut about a 6 inch piece of elastic and pin to the back inside of the waistband. 


Stretch the elastic as you pin it, so when it's unstreteched the waistband is sort of gathered.


Sew two lines with a large zig-zag stitch, stretching the elastic as you go.


If you use matching thread it shouldn't so very much on the outside. I just sewed right over the belt loops because I never want to wear a belt with shorts, but if you want the option you'll need to stitch it in two parts, one on each side of the belt loop to keep the loop free.


This is what the inside looks like. I used black elastic since my shorts are black, but it shouldn't show in the end so it really doesn't matter if you use white elastic. If you wanted to be super fancy you could encase the elastic in matching fabric or something to make it look more finished.


Ta-da! No more gap! 


And now the internet knows just how big my butt is.. :-/

Simple curtains from twin flat bed sheet

I needed some curtains for the office. The window over my computer desk faces east, and there aren't any trees on that side of the building. My favorite time to get serious work done is early in the morning, and even with the mini-blinds shut there was too much sun to properly see the computer screen!

The windows are kind of an odd size, and I didn't want to deal with hemming curtains like I had to for the thick curtains I got for the bedroom when we moved in. Since these were for the office, I didn't need them to block out as much light as the bedroom curtains, so I decided to just see what I could whip up with a $5 flat twin bed sheet.


I just made one panel for each window by cutting the sheet in half and hemming the rough edge.  


Then I cut 6 inch strip of ribbon, folded them in half, and stitched them to the top edge of the curtain.


I took these pictures at night so the curtain color is a little off. With the sun shining through the fabric they are really more of a nice light teal or aquamarine color than just light blue.

Gray ruffle skirt

I made this simple skirt out of two gray pillowcases. I couldn't find the right color gray in broadcloth, but I saw it on the bed sheet aisle...weird. It's just a straight skirt with an elastic waist, and the ruffle is made from the wide hem of the pillowcases.


I've noticed that a lot of my clothes end up looking crooked in pictures. I promise I can cut and sew straight lines and my hems really are even, I just can't seem to stand up straight in pictures!

2.28.2012

Blue ruched ombre leopard print sun dress

Yes, those really are all words, and my newest dress is a fabulous combination them. I had never bought the fabric that comes already ruched at the top because I thought it was kind of expensive for the kind of dress you get out of it, but this was a remnant on super sale so I went for it and had just enough to make this dress. It was super simple, just one seam in the middle of the back and a hem. I added ribbon straps because I don't trust that type of strapless dress, but I think it looks a little better with the white shrug anyway.


If you want a super quick project go for the ruched fabric. I think it took me longer to pose for the pictures than it took to actually make the dress. It could be a nifty project for teaching someone how to sew because it's almost instant results and no shaping or dealing with pattern pieces.

When I bought the blue fabric there was a yellow and pink version in the remnant box too, but it was only half a yard. I'm not sure what to do with it. It only stretches out to at most 24 inches, so I either need to find an extremely tiny friend or someone with a young daughter to make a similar dress for.

Picnic dress

I picked up this nifty red and white plaid tablecloth at the thrift store. At first I thought it was only a circle and I would only be able to make a skirt, but when I got it home I saw it was really a big oblong tablecloth and I had enough to make a whole dress! It's not the most flattering print, but I wanted to play with lining up plaid and I think I was mostly successful. I used New Look 6457 and made view D, but without a belt. I added some extra darts and made the gather at the bust deeper to give it a better shape. It still sort of says "I'm wearing a tablecloth", but I like it anyway.


I think I bought this pattern about six years ago and this is the third dress or possibly the fourth dress I've made from it. I've definitely gotten my money's worth.

2.27.2012

Tutorial: Easy way to fix a stretched out or too-large waistband

I found this nifty broomstick skirt at the Downtown Rescue Mission Thrift Store. Unfortunately it was a size too big and the elastic on the waistband was all stretched out so when I put it on I looked like the "after" picture in a diet ad. But the skirt was in good shape and worth saving. I suppose I could have carefully seam-ripped out the old elastic and replaced it, but I'm all about quick and easy solutions. This tutorial covers a quick and easy way to fix a stretched out or too-large waistband without removing the old elastic.


First wrap a piece of elastic around your waist to determine the correct size waistband. I made my waistband slightly tighter than I wanted the skirt in the end because there's a lot of bulk to the skirt, which will stretch the elastic out a little once it's sewn onto the skirt. Sew the ends of the elastic together so you have a continuous band.


Pin the elastic to the inside of the original waistband, distributing it evenly around. 


Sew the elastic to the old waistband using a zig-zag stitch, stretching the elastic to fit the original waistband size in the process. So in the end, when the new elastic is unstretched, the old waistband will be gathered somewhat. I had to use both hands to hold the new elastic stretched out while sewing; one hand held it in front of the presser foot and one hand behind the presser foot.


You should end up with a nice line of zig-zag going all around the elastic on the inside.


And if you've chosen a matching thread color you should only just be able to see the stitching on the outside of the waistband. I was out of brown thread to match the skirt, so I used maroon, but it's still close enough that you can only just see it. Normally my shirt will end up covering the waistband anyway.


Now the waistband of your skirt should be fitted to the right size!